Patterns on the nails at home for beginners. Patterns on nails for beginners in stages: photo. Scotch to help us
Until recently, applying original drawings to nails was only possible for experienced craftsmen in the salon. In fact, simple methods for applying are known that do not require special knowledge and skills, it is enough to have several devices with sharp tips on hand so that you can bring out miniature elements, bitmaps, any other beautiful motifs, such as flowers, graceful rose petals. Let's consider what devices are needed for drawing simple patterns on nails, as well as techniques for performing elements that are quite affordable for independent manicure procedures at home.
What you need for drawings at home
To derive simple, but quite original models, you first need to be patient. The work is painstaking, but it's worth it. Also prepare nail polish remover, acetone, so that you can quickly remove unsuccessfully drawn drawings. It is desirable to create a calm atmosphere around you. It is convenient to do such a manicure, sitting on a chair, laying out the necessary accessories for home nail manicure on the table:
- , a tool with a small ball on the end. A needle with a bead or a ballpoint pen will do. Dots, dipping in varnish, it is possible to apply dots in a chaotic manner, from which the formation of interesting ornaments, for example, in the classic style using only two colors: black and white. You can peep a lot of all kinds of drawings on the Internet and depict an ornament in the form of funny little animals, New Year's motifs, other compositions from a photo: flowers, butterflies, playing with colors.

- sewing needle suitable for applying simple ornaments, pictures on plates, and on short or long ones. The essence of the process is to apply dots, lines by stretching them with varnish of any shades and in any order: in a circle, in a checkerboard pattern, with a snake. As a result, you can get petals, twigs of any configuration or colored creative lines. With a little practice by mixing several shades at once, you can achieve on your nails a variety of interesting motifs of flowers, butterflies, and other funny patterns.
- brushes. It is good to use with natural pile and have on hand a set of brushes of different lengths and thicknesses. You need to start with simple lines, drawing. You can use the usual simple pencil for manicure and first draw the desired pattern with it. Further, having adapted a little, it is not difficult to learn how to make different lines in thickness, also curls, moving on to more complex compositions as you acquire skills.

- Sponges or wet painting for applying gradient designs on nails, suitable in combination with loose eye shadow. First, the main varnish of light colors is applied, on top, after the layer has dried, partially - shadows in any order (splashes, randomly). Let the drawing dry. Apply the last, fixing layer on top. The technique is applicable in conjunction with a needle, brushes. The spraying technique is not complicated. If you get washouts, other defects, then you can always paint on it, but before the base dries well.

- to be able to apply geometric patterns using adhesive tape or in the form of strips, applying to the nail plates in a different order on pre-painted nails. The strips can be dyed in other colors on request. After removing them and drying the varnish, original pictures are obtained. It is enough to prepare the necessary stencils in advance by cutting out interesting shapes of flowers, petals, etc. The main thing is to apply adhesive tape or stencils on prepared plates, previously coated with a base layer.

- (2-3 different colors are enough to start). First, white varnish is applied as a base on the nails. Further, covering the skin with adhesive tape around the cuticle to be treated, a layer of varnish of a different color is applied: blue, red. With a needle or a plastic stick, you can simply spray the main color on the nail, and on top - a varnish of a different color. You will get multi-colored stains. After they dry, the top of the nail is covered with gloss. The end result is an excellent effect.

- Gels(paints) to create gel drawings with almost any tool at hand. Required . When applying a pattern, each layer will have to dry up to 1-2 minutes, otherwise the picture will be smeared. First, a base white layer is applied to the nails, then the main color pattern and the final layer of gel. After it dries, the sticky layer just needs to be carefully removed. The process is laborious, but the result is amazing.
- Lucky, by mixing 2-3 shades. First, the cuticle is processed, then the nails are covered with white varnish for a general background (preferably in 2 layers, without affecting the cuticle), so the patterns will look distinct and rich. After drying, you can, for example, put a few vertical dots with red varnish, then burgundy dots on both sides of the nail, in the center or whatever you like (parallel, horizontally). After the layer has dried with a needle, spiral movements can be carried out. At the end of the work, to smooth the surface, cover the nail with a fixing composition, on top with glitter, sparkles. Decoration on the nail plates will turn out just gorgeous.
- decorative elements. Any pieces of lace, washcloths (the effect of a fisherman's net is obtained), mesh fabric, sponge, crumpled cellophane for dipping into a shiny varnish and applying to the plates, adhesive stickers, for example, in the shape of a crescent, adhesive tape for cutting out figures and circles, are suitable for obtaining patterns, which will be applied to the nails and disguised as a varnish coating.

How to prepare nails
Preparation consists in leveling, filing the nail plate, in removing keratinized particles, as well. Next - applying a transparent base base in an even layer, after drying - various patterns with the tools at hand. Beginners should start with the same type of options.
Step by step guide for beginners
Drawings with needles. Special skills are not required. All you need is a needle and a few contrasting colors of polish. The technique is:
- covering plates with a base transparent color (scratches may remain from the needle);
- drawing varnish for the picture after the first layer has dried;
- affixing multiple dots or lines in any order you like;
- implementation a well-thought-out drawing on dots or lines using a needle;
- covering again with a layer of a colorless base after the pattern has dried in order to fix the ornament on the nail as best as possible for a long time.

Using dots. A technique for making dots or drawings with acrylic paints. First, the plate is covered with a transparent composition, then the tip of the dots is dipped, dots are formed on the nail. To get dots of different diameters on the nails, you can buy ready-made dots in a set or use handy tools: a cotton swab, a match, the back of a pencil with an elastic band at the end, a carnation (needle) stuck in an eraser.

Drawings with brushes. One of the simple drawings is made like this:
- cooking two brushes - medium and thin, also varnishes: black, white and pink;
- coating plates first with pink varnish;
- affixing white lacquer dots in the center;
- drawing the contours of the bow along the outgoing rays with a thin brush;
- shading a bow with a wide brush;
- decor contour in the middle of the bow with a thin brush and black varnish to make folds;
- tassel you can draw flowers, but of course, drawing lessons are still worth going through initially.
Having processed the nails with a base layer of varnish with a yellow brush, petals are drawn, flowers are formed, veins are light brown. Nearby, you can arrange another flower for a variety of design. For veins, use coral. So gradually, having mastered the basics of drawing skills, you can move on to more complex drawings and patterns, which are presented in the photo in a wide range.

With the help of ordinary adhesive tape, transparent varnish and two colored types, you can apply simple but original drawings, and here is one of the techniques:
- coating nails with colored monochromatic varnish;
- gluing on a plate of a pre-prepared stencil (the pattern can be cut from a wide adhesive tape);
- dense pressing to the nail after the first base layer has completely dried;
- removal adhesive tape after the applied pattern has dried;
- coating a transparent base to hide the resulting irregularities;
- with adhesive tape you can apply geometric patterns by gluing certain areas with them in order to process free (open) ones with a different composition, for example, red. They can also draw lines along the plate, on the sides, and form a flower in the center with apricot varnish. Of course, patience is needed. To draw them exactly on each nail at once, a lot of small elements will require some skill.

Sponge in the form of a porous sponge, suitable for performing manicure on nails using the ombre technique, or the effect on the nails is obtained by using the composition of fuchsia, coral, pale pink, cherry. First, the main color is applied to the plates, then:
- on the sponge varnishes of 2-3 colors are distributed in any sequence;
- dipped sponge into the composition, gently applied to the plate for impregnation;
- above- a fixing composition for smoothing out irregularities after applying the main tone. It is the sponge that will give the plates a glossy sheen. After the nails are dried, the remains of the composition around the cuticle are removed with a cotton swab. As a result, the color palette on the plates with chaotic transitions from one to another is ready;
- during the transition on the other nail, the color palette needs to be updated, i.e. each time paint over all the colors of varnish on the sponge.

Before performing any of the proposed nail manicure techniques, you first need to practice, draw models on paper. Next, prepare high-quality materials and tools. For a smooth, even coating, varnishes should be of medium consistency (not liquid and not thick).

Having studied all the techniques, choosing for yourself the best way of manicure to give elegance and grooming to your nails will not be difficult. It is quite possible to achieve original simple patterns on nails at home and without the help of masters.
Not everyone can afford to go to salons, but you can make a beautiful manicure at home. You can diversify the design with drawings. Consider beautiful and modern designs on the nails.
A beautiful manicure is an important part of the image for any woman. After all, men often pay attention to women's hands and how well-groomed they are. Not everyone can afford to go to salons, but you can make a beautiful manicure at home. You can diversify the design with drawings. Today Manikurchik.ru will give you ideas for nail designs that can be done without any special skills.
What tools and materials are needed
The drawing will not be neat if the nails are broken, have different shapes and untidy cuticles. First you need to qualitatively and put your nails in order. Next, you can proceed to varnishing and drawing a picture.
Modern nail art involves the use of various kinds of improvised means, with the help of which beautiful drawings are obtained. Absolutely everything is used as decor materials, from stickers to rhinestones.
To create drawings, you may need:
- Scotch
- Fine brush
- Needle
- Glitter Powder
- Nail stickers
- Glue and foil
- Pebbles and rhinestones
- Varnishes and paints
- Toothpick
- Sponge
The selection of materials will be easy if there is an exact scheme for the future drawing.
toothpick pattern
He needs a toothpick and colored varnishes. If everything is done correctly, the result will look neat, and a manicure is suitable both for a holiday and on a weekday:
- The nails are covered with a monophonic dark varnish.
- A little contrast varnish is poured onto a sheet of paper.
- Draw a pattern using a toothpick.
- When it dries, cover with a colorless varnish.
It is so convenient to draw a heart, a flower, a twig or any other pattern - it all depends on how much free time you have and what you want to depict on your nails.

Simple drawings with a needle
If you want to create a neat pattern, then you can’t do without a needle to draw thin lines. An ornament with a needle is created on nails of any length, constantly changing color and creating contrast.
To do everything right, follow these instructions:
- A transparent base is applied to the nails.
- Bright varnish put small dots with a brush. To make it more convenient, the varnish can be poured into a small bowl or onto a sheet of paper.
- A drawing is drawn with a needle - all points are connected or other patterns are drawn.
- After all this should dry up.
- Fix the result with a fixative varnish so that the pattern lasts on the nails for as long as possible.
In this technique, it is very convenient to draw butterflies, flowers, twigs, since a thin needle is suitable for depicting small details.

Lacquer drawings step by step
If you are not comfortable using a toothpick or a needle, you can buy some varnishes with thin brushes and apply patterns with them.

For example, the youth pattern "sneakers" looks bright due to the use of different colors. But it will take a little time and patience to apply it:
- Nails are covered with different colors of varnish.
- With the help of white, draw a toe at the nail.
- Lines are drawn along the length.
- All stripes are connected diagonally.
- Black varnish put dots on top of the "sock" and draw them.
- Colorless varnish is used to fix the result.

Classic manicure became popular back in the 60s and has remained relevant ever since. This combination is suitable for both a young girl and an aged lady:
- Prepare your nails for applying polish.
- Special manicure stencils are glued to the base. They should form a semicircle.
- Apply 2-3 coats of base color polish.
- Dry it.
- Peel off the stickers and paint over the semicircle with a varnish of a different shade. It can also be left unpainted.
- Apply a top coat of colorless varnish.


brush drawings
In specialty stores there are a lot of varieties of brushes for painting. They have different lengths, shapes and thicknesses. Using them, you can create all sorts of masterpieces of nail art.
If you like to experiment, buy two different brushes. So it will be convenient to apply large and small details to decorate nails.


Tape design
Using simple tape, you can create a moon or French manicure, as well as apply complex geometric patterns to your nails. It is only necessary to think over the design in advance, and at the end cover everything with a fixative varnish.


Dots and how to work with it
Dots is a manicure tool that looks like a pencil with a ball at the end. With it, any patterns are applied. The technique of working with it is that a different shade is applied to the main color applied to the nail - the dots are gently dipped into the liquid and patterns are created over the entire surface. It is convenient for them to create points and draw lines, and the main rule when working is to apply varnish on a wet surface.


Acrylic drawings
Not so long ago, acrylic paints began to be used in creating a beautiful manicure. Their color scale is various, besides, brightness remains for a long time as paints are steady against steam and moisture.
This technique can be used to draw twigs, butterflies.


In conclusion, it is worth noting that the drawings on the nails are limited only by your imagination. You can safely experiment with color solutions, combine techniques and choose the method that is less labor-intensive, but at the same time allows you to achieve better results.
Video “A simple drawing of a ladybug”
Have you already tried to show your imagination and create an original pattern on your nails? Show your result in the comments!

Drawings on nails with a brush is by far the most convenient and affordable art of decorating nail plates, which even the most inexperienced fashionista can master. For beginner girls in the world of manicure, creating drawings from scratch is difficult, as it requires a certain amount of experience and knowledge. Some pioneers tend to believe that the skill of artistic painting of nails is subject only to professionals in their field.
Regular classes for beginners will allow a novice manicurist to independently master and eventually hone the basics of nail painting, which will bring her closer to the skill of a real art painting guru. Without a doubt, at first, drawings on nails with brushes at home will be primitive and simple. And even in the event that “the first pancakes will be lumpy” for you, you should not despair and give up ahead of time.

It will take quite a bit of time - and your hand will become more confident, the design will acquire complex curls, and if you still connect your imagination, turn to your own ingenuity - then the glory of a nail master will be provided to you! So, where do you start making drawings on your nails with a brush?
Preparation for “drawing”
Before you learn the basics of nail painting at home, you need to spend a lot of time on the preparation stage:
- You should draw a pattern in a comfortable environment, preferably alone, so as not to be distracted by extraneous irritants, and also so that there is no third-party caretaker who will criticize and comment on your design and the correctness of its implementation.
- Get enough nail polish remover, because the first time you will not be able to get the perfect picture.
- For simplicity and convenience, first select the pattern you like, print the instructions for it, or open the image on your phone / tablet.
- Prepare your nails in order: cut the cuticle, remove the burrs, give the nails the desired shape.
- Prepare in advance all the accessories and tools necessary for the procedure.

Combat arsenal for nail work
To perform "jewelry work" on nails, you should stock up on a certain set of materials, the most important and difficult of which are brushes. They allow you to embody the most unique compositions on the nail plates. When choosing brushes, give preference to natural rabbit or squirrel hair. In order for the brush to serve you for a long time, after work, wash it in warm water, dry it thoroughly and put it in a case.

Types of brushes:
- Spot brush - designed for fine drawing of small details.
- Liner brush - allows you to draw even and long lines in one stroke.
- Flat brush - designed for drawing large, wide patterns, as well as for applying sparkles, powder and sand.
- Fan brush - responsible for mixing shades, creating a background. She can do painting in an abstract or landscape style.
- Petal brush - used in drawing according to the technique of Chinese painting.
- Dagger-shaped brush - allows you to sketch empty elements, draws individual details.

In addition to brushes, nail design also uses:
- Sewing needle, toothpick - allows you to create small flowers, patterns at home.
- Adhesive tape - for creating images with a geometric shape.
- Sponge - useful for blending pigments.
- A stick with a beveled cut is used as a cuticle remover, as well as for placing beads or a stone on the nail. She can independently change the location of the foil, piece of fabric or picture.
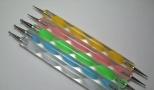
- Dots - a tool with balls at the ends is necessary for drawing dots, ornaments, curls, mixing the color palette.
- Acrylic paints.
- Nail polishes.
- Decor (rhinestones, sequins, sequins, broths, beads, mica, sand, foil, velvet and others).
For convenience, we present to your attention step by step schemes for performing images on nails using a brush. It won't take you long, about 40 minutes. And when you fill your hand, you can do your own manicure in just 15 minutes.

Lecture 1. "Yin and Yang"
You will need: base coat, light and dark varnishes, top coat.
Instruction:
- Apply base coat, wait for it to dry.
- Using white polish, divide the nail into 2 parts.
- Using a light varnish, paint over the left half of the nail, then cover the right half with dark.
- While they dry, use a brush to make 2-3 drops of varnish of the opposite color. Those. on a light background - dark drops and vice versa.
- Use a brush to make streaks.
- After complete drying, fix with a top coat.

Lecture 2. "Rainbow"
You will need: base coat, 3-4 multi-colored varnishes, silver varnish, fixing agent.
Step by step scheme:
- After applying the top coat on the nails, cover them with any varnish at a distance of 2 mm from the cuticle, wait for it to dry.
- Apply another color at a distance of 5 mm, and do this with all other shades.
- Take a thin brush and draw silvery lines at the junction of shades.
- Apply a fixer.

Lecture 3
You will need: base, green, white and gold varnishes, fixative.
Step by step diagram:
- Apply base coat to your nails.
- Cover the nail with green color, wait until it dries.
- With a brush, put 3-4 dots in white - these are chamomile petals.
- Draw the middle of the flower in gold color.
- Finish the procedure with a fixing varnish.

Lecture 4. "For lovers"
You will need: base base, 4 contrasting varnishes (less possible), fixing varnish.
Execution steps:
- After spreading the base coat, apply a background color to the nails, let dry.
- Put 5 dots in other colors and draw lines through the middle of the drops with a brush to look like hearts.
- Fix the result with a fixer.

Creating nail art is a very exciting process that any girl can do step by step. Create and be inspired by our work.
Video: Nail design brushes and their use
Artistic images on the nails can be different - from simple curls and lines to a work of art. can only be done by experienced craftsmen, therefore it is better for beginners to start mastering nail art with simple concise drawings. Now a beautiful neat manicure is in fashion and there are a lot of options, materials, tools and instructions with which you can make drawings on nails for beginners step by step.
To make a manicure no worse than in the salon, you need to assemble at least a minimal basic set of nail master tools. When making drawings, you can use different devices, such as brushes, stamping, nail tape and others. To begin with, it is worth analyzing in more detail the most relevant tools:
Basic nail art techniques
There are several options for nail plates. You can make patterns using:
- adhesive tape;
- nail files;
- sponges;
- tulle;
- cotton swab.
Additionally, there are no less interesting techniques for creating nail art, which are used even by masters. It may seem difficult at first to make a design on your own, but if you follow the drawing scheme step by step, even a beginner will succeed.
Patterns on the nails in dot technique. Learning to draw with dots

Simple drawings in dot technique
Dots is a thin stick with a metal ball on the tip. More often this tool is made of plastic and wood, less often of metal. To create dots or polka dots on the nail, you can use a dots of small or medium size. With this tool, you can create a neat dot technique in minutes. For design, simple and acrylic varnishes are suitable. Applying an artistic element with dots is convenient - it can be compared to drawing with a ballpoint pen.
Gradient nail decoration
This effect can be compared with an ombre - a smooth transition from one color of varnish to another. Ombre means lightening the tip of the nail by several tones, while the main color of the plate should be in a harmonious range. Another name for the Dip Dye gradient is that with this design, several different shades of varnish are combined, between which a transition is created on the nail. Usually, 5 shades of varnish are used for a high-quality gradient.
Gradient technique with a transition on the nails:
- First you need to choose two varnishes, for example white and blue. Cover the nail completely with a blue tint.
- On a plastic palette, mix blue varnish with a drop of white, so you get a different color. Color the second nail.
- To paint the third nail, you need to add another drop to the already mixed colors. The color will be even lighter. Repeat the same with the fourth and fifth nails.
Bottom line: Each nail turns out to be a tone lighter, while the overall picture of the manicure looks harmonious due to the observance of one color scheme.
Drawing patterns with a brush with acrylic paints

simple painting
Classic acrylic nail painting is relevant not only for professional masters, but also for beginners. Acrylic can, abstractions, geometric shapes and much more. Experts advise taking water-based acrylic paint. You will also need a thin brush. Before applying the drawing, you can practice on paper. Over time, the technique of drawing patterns with acrylic will improve and the novice master will be able to create more complex compositions.
Chinese painting
The second name of this technique is “double smear”. Chinese painting is created with a flat brush, which is first dipped in two or three shades of varnish. When applied, the colors are mixed, so more realistic and voluminous drawings are obtained. To master Chinese painting, a beginner needs to purchase acrylic paints, a flat brush and a palette for the convenience of applying varnish.
Scotch to help us
Scotch tape is necessary for a nail master to create nail art with even stripes and geometric shapes. Three stripes of multi-colored varnish can be applied to the nails (you can not carefully). Next, you need to stick a sticky tape for manicure and cover with dark varnish. After the tape is removed, you will get a beautiful design with neat lines.
We draw with a needle. toothpick patterns
This method is similar to drawing with a needle. The main difference between toothpick patterns is thicker lines that cannot be as thin as when using a needle. The advantage of this painting option is the difference between the tip and the needle tip, which is sharp and can damage the base coat. For beginners, painting nails with a toothpick is a great option, as a needle is suitable for experienced craftsmen. You can absolutely draw - flowers, geometric patterns, lines.
Other methods for creating simple designs on nails
Decorating nails with decorative ornaments, stickers and rhinestones is not a new fashion trend, but some interesting manicure options have appeared relatively recently. Also, the novice master will be relevant to the technique of drawing a pattern by stamping.

Nail stickers are the easiest way
Not always the sticker looks beautiful on the nail plate. But since the choice of stickers is large, you can choose an image for each length of the nail. Medium-sized stickers look good on short nails. You can make photo prints or bright sliders for the event. For each event, you can choose a thematic sticker - the main thing is not to overdo it. If you stick a sticker on shellac, you should take into account that such a manicure will last for a long time and can get boring. The advantage of stickers: easy to apply, do not damage nails and last about 3-7 days.
decorative ornaments
Nail art is a fun activity. Almost every woman can decorate her nails with various details, even if she has never done nail art. Decorative details for nail design:
- broken glass;
- melange of different colors;
- rhinestones;
- sequins;
- yuki flakes;
- mirror powder;
- thermo rubbing;
- broths;
- glitter;
- marble chips;
- foil;
- phosphoric rub;
- nail wire.
From all the above materials, you can make an unusual stylish manicure that will be special and unique.
Drawing with tulle
To create a pattern on the nail, you can use a fabric - a piece of tulle. This technique is unusual, but the nail design is gentle and elegant. Tulle can be taken in a fine mesh, medium or patterned. You need to apply the fabric on the dry varnish so that the pattern is imprinted on the nail plate. Then a piece of tulle is carefully removed, and the nail is covered with transparent varnish. There is also another interesting option - do not remove a piece of tulle from the nail. The result is a delicate design.

French manicure with a pattern
If a simple jacket is boring, then it can be supplemented with decorative details and nail art will be transformed in a new way. Each woman can decide for herself how to decorate her manicure, the main thing is to pay attention to ideas that can inspire. For example:
- you can draw patterns or a flower on the ring finger with acrylic paints;
- stick rhinestones on several nails;
- use nail tape;
- stick a sticker of any choice - it can be a concise or cheerful drawing.
water manicure
Marble nail art (water) looks very impressive on nails. Such a design is made simply: a few drops of the same color of varnish are dripped into a container of water. It is recommended to add a few more colors to it - there can be 2-3 or more shades. With a toothpick, you need to draw patterns on the water. Then the finger is dipped into water, and an unusual multi-colored pattern is imprinted on the nail.
Drawings with Template Plates and Stamps
If there is absolutely no experience in drawing patterns on nails, but you want to make a beautiful manicure at home, there is stamping. It consists of several plates, on which artistic details, figurines, flowers are applied. A professional store sells a stamp and a scraper to remove excess polish. With the help of stamps, you can create a unique design, the main thing is to take into account the proportions of the picture.
- To make it easier to apply the sticker, you can use tweezers. It is also desirable to glue the element away from the cuticle and side ridges of 1.5 millimeters.
- For water design, it is desirable to take water at room temperature. In cold liquid, the pattern may dry or curl too quickly. For this type of design, it is not advisable to use thickened varnishes.
- It is advisable not to glue a lot of elements on short nails, especially if they do not fit together.
- You can draw lace using a special manicure gel paint. This activity is exciting, but you need to get used to it. It may not work the first time, but after a couple of practices, every beginner will master lace design.
- So that the design does not look vulgar, experts advise applying lace or rhinestones on only 2-3 nails.
Conclusion
Almost every novice manicure master can master the skill of artistic nail art. In making drawings on nail plates of any complexity, the main thing is involvement, the ability to show imagination and perseverance.
From the video tutorial you will learn how to quickly and beautifully make monograms and other patterns on the nails.
In contact with
Today, the trend is manicure with bright fancy patterns. Such drawings are performed in various ways using different techniques and always look spectacular. Consider some of the most common methods and features of applying patterns to the nail surface.
What you need to create patterns on nails
Having decided on an unusual manicure, you need to take care of the following materials, fixtures and tools:
- varnishes of various bright colors;
- acrylic paints;
- stickers on the nail plates;
- sets for ;
- basics for manicure;
- varnish solvents;
- liquid fixative;
- a set of dots, toothpicks or sewing needles of different sizes;
- adhesive tape;
- sponges to create a pattern;
- different .

How can you draw them
You can draw on the nail surface in a different way, using various tools and devices. You can use thin brushes, sewing needles or toothpicks. Convenient is a special tool with round ends, designed for applying patterns to the surface of the nails, which is called dots. The use of adhesive tape for patterning is also one of the techniques for applying patterns on nails. A simple and convenient way is to use stamping and stickers, with which finished masterpieces are applied.
How to draw
Different techniques for the execution of patterns have their own specifics. Let's consider some of them.

A stamping kit is a creation kit that includes a stamped metal disc.  on the surface of engraved patterns, paint to fill in the engraving pattern, rubber stamps, a scraper to remove excess paint.
By and large, stamping serves to apply a screen pattern to the surface of the nail.
Consider how to apply a stamping kit to get a beautiful pattern on the nail plates:
- choose your favorite pattern on a metal disk;
- apply a special thick varnish from the set on the plane of the engraved disk, remove the excess with a scraper;
- press the rubber stamp firmly against the varnished disc;
- having achieved an imprint of paint on the stamp, transfer the pattern to the nail plate, pressing the stamp to its surface;
- in order for the drawing to be preserved for a long time, you need to cover the nail with a reconciliation with a transparent varnish.

Drawing with sewing needles
- It is necessary to prepare varnish bottles of several contrasting colors and sewing needles;
- apply a colorless base on pre-treated clean nails, and then base varnish;
- dry the varnish surface;
- grab the varnish on the tip of the needle and apply it in the form of a drop on the nail surface;
- drops can be applied arbitrarily or in accordance with the intended design;
- without waiting for the drops to dry, they are distributed with a needle, creating patterned lines. In this case, it is impossible to press hard on the surface of the nail with a needle;
- you can complement the picture with shiny dots applied with neon or silver varnish, as well as with the help of rhinestones and beads.
Drawing with dots
This is a tool that represents a rod with balls at the ends of different diameters. With the help of dots, you can apply dots, forming different patterns from them, from simple application of individual dots in the form of peas to complex compositions.

Consider how a simple pattern is made using this tool:
- Apply a dark base on the plane of the nail and let it dry;
- using dots, apply dots of different sizes with white varnish;
- after the white peas have dried, apply dots of a different color between them, you can partially overlap the previous ones;
- when the drawing dries, fix it with a colorless varnish.

Unusual Techniques
An interesting abstract manicure on nails can be created using water. It does not require special drawing skills. The drawing is obtained using the abstract spreading of varnish on the water surface.
To complete it, you will need:
- several colored varnishes;
- warm water;
- small capacity (can be a glass);
- toothpick;
- fat cream.

The execution technique is as follows:
- nails are covered with a base and allowed to dry thoroughly;
- from two to four colored varnishes of a liquid consistency are selected;
- a greasy cream is applied to the skin near the nail;
- warm water is poured into the container, the temperature of which should not exceed 40 ° C, otherwise the varnish will curl;
- selected colored varnishes are alternately dripped into the water. Each next drop is immersed in water after the previous one has spread a little on the water. It must be borne in mind that the first drop of varnish will dominate;
- using a toothpick, marble stains are created from lacquer drops;
- until the drops form a film, the nail of one finger is slowly immersed in the container with the plane towards the pattern;
- while the finger is immersed in water, the remaining drops are collected with a toothpick from the water surface, and the finger with stains applied to the nail is carefully removed from the water;
- this procedure is done with all fingers, each time dripping fresh portions of varnish drops and forming stains on the water from them;
- stains that have fallen on the skin near the nail are easily removed with a napkin, since it was covered with cream.

Thanks to the effect of the marble pattern, such a manicure always looks attractive and original.
Manicure with newspaper
- The manicure, invented by a Frenchwoman, looks original and is often used by advanced fashionistas in the design of the nail service. To create a picture using a newspaper you will need:
- white varnish (beige or any pastel shade can be used);
- newspaper;
- fixing colorless varnish.

Manicure should be performed as follows:
- From the newspaper, cut out pieces with text, in the form of a nail plate, the font of which suits you.
- Treat the nails, aligning the edges and carefully pushing the cuticle away from the surface of the nail. Cover the surface of the nail plate with a layer of the selected varnish. White color looks the most advantageous; against its background, black text looks contrasting and clear.
- Moisten one of the prepared pieces of text with water from the side where the text is printed.
- Without allowing the paper to be completely saturated with water, apply it to the dried and degreased surface of the nail with the side with the text.
- After holding for 10-30 seconds, during which the text will be printed in a mirror form on the nail, carefully remove the newspaper scrap from the nail surface.
- If the result is satisfactory, and the letters are well imprinted, wait for the surface to dry completely and protect it with a coat of clear varnish.
- If the print does not work out, repeat the procedure again, first freeing the surface from the previous piece of text and degreasing it.

Having trained once, you can create such an original design without difficulty.
Before you start creating a designer manicure by drawing on the plane of the plate, you need to consider the following:
- It is better to start with simple patterns in the form of stripes, circles, droplets, stars, etc.
- Before performing a colorful drawing, it is necessary to put the nails in order: align the edges, remove or push back the cuticles, and degrease the surface of the plate.
To create a more spectacular look of the picture, it is good to use rhinestones, special ones, varnishes with sparkles.
- When choosing a design, you need to consider its relevance. It should match the clothes, the situation, the season, etc.
- Any drawing made on the nail surface requires fixing, this can be done by a colorless varnish coating.
- When doing work on your nails, you should not limit yourself to creativity, you can always bring your own ideas to the design of drawings, not forgetting the basic rules for their implementation.
- When all the subtleties of a designer patterned manicure are mastered, he will constantly delight the girl with his unusualness and diversity.